Unlock Tender Smoked Tri Tip: Low & Slow Secrets Revealed
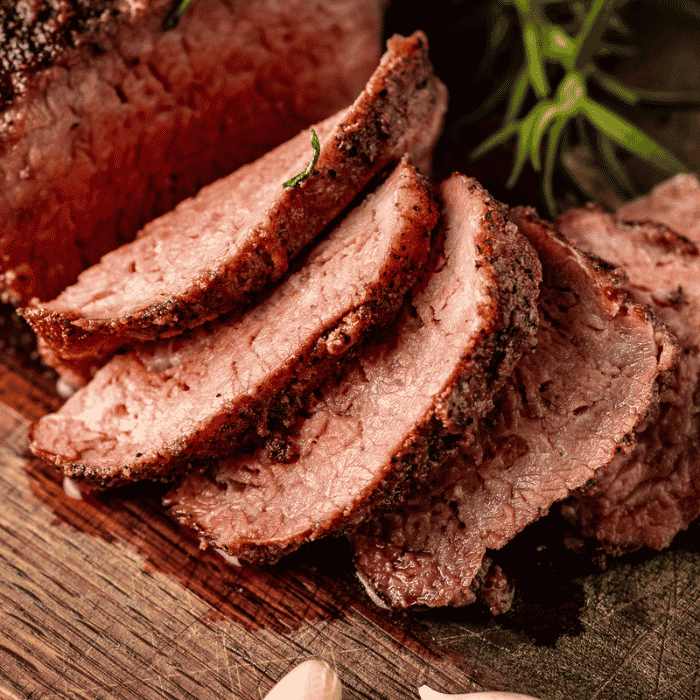
Imagine slicing into a perfectly cooked piece of beef, each thin cut revealing a beautiful pink smoke ring, a rich, savory aroma, and a texture so tender it practically melts in your mouth. This isn't just a dream – it's the reality of a masterfully prepared
smoked tri tip. Often overshadowed by brisket or pork shoulder, the tri-tip roast is a culinary hidden gem, especially when given the low and slow treatment. This guide will reveal the secrets to transforming this triangular cut into an unforgettable centerpiece, ensuring juicy, tender results every single time.
Understanding the Tri Tip Cut: A Beef Lover's Best-Kept Secret
The tri-tip, also known as the "triangle roast" or "bottom sirloin," is a lean, flavorful cut of beef hailing from the sirloin primal. Its distinctive triangular shape and robust beefy flavor make it a favorite among those in the know, particularly on the West Coast. While it boasts a rich taste, its relative leanness means it can dry out if not cooked properly. This is precisely why the "low and slow" smoking method is its perfect partner. Unlike fattier cuts, tri-tip doesn't require hours upon hours of smoking to render fat, but it greatly benefits from extended time at lower temperatures to absorb smoke and become incredibly tender without losing its natural moisture. When choosing your tri-tip, look for a roast around 2-3 pounds with a good, even thickness and some marbling throughout, as well as a decent fat cap on one side. This fat will render during the cook, basting the meat and adding to its incredible flavor.
The Low & Slow Philosophy: Why it Works for Smoked Tri Tip
When it comes to smoking, "low and slow" isn't just a catchy phrase; it's a fundamental principle that yields superior results, especially for cuts like tri-tip. Direct grilling over high heat might cook it quickly, but it often leaves the interior dry and tough, lacking the deep flavor profile that smoking provides.
Smoking at lower temperatures (typically between 225°F and 275°F) allows several magical processes to occur:
- Deep Smoke Penetration: The longer exposure to smoke at these temperatures allows the wood smoke compounds to infuse deeply into the meat, creating that characteristic smoky flavor and vibrant pink smoke ring just beneath the bark.
- Moisture Retention: Slower cooking prevents the rapid evaporation of internal moisture, resulting in a juicier final product. The lean nature of tri-tip particularly benefits from this.
- Connective Tissue Breakdown: While not as abundant as in brisket, tri-tip still has some connective tissues that slowly break down into gelatin during extended low-temperature cooking, contributing significantly to tenderness.
- Even Cooking: Low and slow heat allows the internal temperature to rise gradually and evenly from edge to edge, ensuring consistent doneness throughout the roast.
This method builds a deep, complex flavor that simply cannot be achieved through quick grilling. It transforms a good cut of beef into an extraordinary culinary experience, making
easy smoked tri tip a true show-stopper.
Mastering the Prep: From Trim to Rub
The journey to perfect smoked tri tip begins long before it hits the smoker, with meticulous preparation. This stage is straightforward but critical for achieving optimal tenderness and flavor.
- Trimming the Tri Tip: Begin by carefully examining your tri-tip roast. You'll likely find a silvery, tough membrane known as "silver skin" on one side. This needs to be removed as it won't render or tenderize during cooking and can create an unpleasant chew. Use a sharp boning knife, sliding it just beneath the silver skin and carefully peeling it away. You'll also want to trim any excessively thick areas of the fat cap, aiming for about a ¼-inch layer of fat. This provides moisture and flavor without becoming greasy.
- Binding and Seasoning: Tri-tip's robust beefy flavor shines with a simple yet effective rub. Start by lightly coating the entire roast with a thin layer of olive oil or a preferred binder like mustard. This helps the seasoning adhere. For the rub, the classic combination of coarse black pepper and garlic powder, along with ample kosher salt, is all you truly need. Feel free to add a touch of onion powder, paprika for color, or a pinch of cayenne for a subtle kick if you wish. Be generous with your seasoning, ensuring all surfaces are well-covered.
- Resting with the Rub: Once seasoned, let the tri-tip sit at room temperature for at least 30 minutes, or even better, refrigerate it for 2-4 hours (or overnight) to allow the rub to penetrate and the salt to begin its tenderizing work. Remember to bring it out of the fridge about an hour before smoking to allow it to come closer to room temperature for more even cooking.
The Smoking Process: Temperature Control & Flavor Infusion
With your tri-tip prepped, it's time to fire up the smoker. Consistency and careful monitoring are your allies here.
- Smoker Setup and Temperature: Preheat your pellet smoker, offset smoker, or electric smoker to a stable temperature between 225°F and 250°F. For pellet smokers, which excel at maintaining consistent temperatures, this is particularly easy. If using an offset smoker, ensure you have a clean, thin blue smoke – white, acrid smoke will impart a bitter taste. A water pan placed in the smoker can also be beneficial, helping to stabilize temperatures and add moisture to the cooking environment, which aids in smoke adherence.
- Wood Choice: The type of wood pellets or chunks you use will significantly impact the flavor of your smoked tri tip. Red oak is a traditional choice for tri-tip, imparting a classic, robust smoky note. Other excellent options include hickory (strong and bacon-like), cherry or apple (milder, slightly sweet, and create a beautiful mahogany color), or even a blend of fruit woods.
- Monitoring Internal Temperature: This is arguably the most critical step. Insert a reliable probe meat thermometer into the thickest part of the tri-tip, avoiding any large fat pockets. Smoke the tri-tip until it reaches your desired internal temperature. Remember that the meat will continue to cook a few degrees during the resting phase (carryover cooking).
- Rare: 120-125°F (pull at 115-120°F)
- Medium-Rare: 125-130°F (pull at 120-125°F)
- Medium: 130-135°F (pull at 125-130°F)
For optimal tenderness and flavor, we recommend aiming for medium-rare. Cooking time will vary based on the size and thickness of your tri-tip, but generally expect 1.5 to 3 hours. Always cook to temperature, not to time.
The Perfect Finish: Sear, Rest, and Slice
The final steps are what elevate your smoked tri tip from delicious to extraordinary, ensuring a fantastic crust and ultimate tenderness.
- The Reverse Sear (Optional, but Highly Recommended): Once your tri-tip reaches your desired internal temperature, you have the option to finish it with a high-heat sear. This creates a beautiful, flavorful crust (often called "bark") and locks in juices. Transfer the tri-tip from the smoker to a preheated grill (set to high heat) or a screaming hot cast-iron skillet. Sear each side for 2-4 minutes, or until a desirable crust forms. For an extra layer of flavor, you can baste the tri-tip with a knob of butter, a sprig of rosemary, and crushed garlic during the last minute of searing. This is key for those seeking to achieve perfect crust & smoky flavor: smoked tri tip guide.
- The Crucial Rest: Immediately after searing (or directly from the smoker if not searing), transfer the tri-tip to a cutting board and tent it loosely with aluminum foil. Let it rest for 10-15 minutes. This step is non-negotiable! Resting allows the muscle fibers to relax and reabsorb the juices that have migrated to the center during cooking, ensuring a succulent and moist roast. Skipping this step means all those precious juices will run out onto your cutting board, leaving you with dry meat.
- Slicing Against the Grain: This is perhaps the most important technique for achieving maximum tenderness. The tri-tip is unique because its grain runs in two distinct directions. You'll need to identify these and adjust your slicing angle accordingly. Typically, one part of the roast has the grain running lengthwise, while another section has it running at an angle. Slice the tri-tip into two sections where these grains meet. Then, slice each section against its respective grain into thin slices, about ¼-inch thick. Slicing against the grain shortens the muscle fibers, making the meat incredibly tender and easy to chew.
With these low and slow secrets revealed, you're now equipped to create a truly exceptional smoked tri tip. This once-overlooked cut will become your new go-to for backyard cookouts, special gatherings, or simply a delicious weeknight meal that tastes even better as leftovers. So fire up your smoker, gather your favorite sides, and prepare to impress with this tender, smoky masterpiece.